Let me begin with a little motivation! There are many impressive women out there, who make homemade everything in their kitchens. Homemade bread, homemade butter, homegrown herbs, canned soup, vegetables, fruit . . . and the list goes on. I even have a friend who makes her own honey! While I am slowly learning a few new skills, I am not one of those extraordinary women. I'd like to think I'm pretty average when it comes to my homemaking skills in the kitchen. I make satisfactory cookies from scratch, I google for new recipes, I've made freezer jam. However I also buy frozen dinner rolls, canned pie filling, cake and brownie mixes, and I've never grown my own vegetable garden. I am not the type to make my own dairy products. So if I can manage this, so you can you!
Another point of motivation- the price of Greek Yogurt. Unless money ain't nothin' but a thang, you've noticed it's pricey. Typically a 6 oz cup is just over a dollar. With 3 kids eating 1 cup each a day with breakfast or lunch, that adds up quickly! When I make my own, it breaks down to $0.32 for a 6oz cup. My DH is actually quite proud of me for doing that math. Not that he doubted my computation skills, more my interest in a budgeting detail like that. Let's just say he's the "saver" in our family. I got major brownie points for this new frugal discovery!!
Have I convinced you to try? Excellent. Scroll on for my very first "how to" entry on my nerdy blog. Please forgive the lack of "cuteness" in my pictures. Unlike seemingly everyone on Pinterest, I'm not a food photographer.
How To Make Your Own Greek Yogurt
You can half this recipe easily if you want less yogurt, but we go through it so quickly, that I need to make the larger amount. If you want your milk to incubate overnight, begin the process approximately 2 hours before you want to go to bed. After giving it 10-12 hours to incubate (I do 12) you need about 20 minutes prep in the morning, and then can leave it for 6+ hours to strain in the fridge.
Ingredients/Tools
1 gal of milk6 oz of plain yogurt, with live cultures
crockpot
crockpot liner
2 thick bath towels
meat thermometer
large strainer
big bowl, large enough to fit under your strainer
thin cotton/linen dish towel
rubber band
toppings of choice
Step 1: Heat your Milk to 180 degrees

Update: I tried the microwave, and it worked well. It took approx. 17 min. for the milk to reach 180 deg.
Step 2: Cool Milk

Step 3: Pour Milk into Crockpot, and Check Temp.
Remove the towels, and pour the milk into the warm crockpot. After a couple minutes, check the temperature again, making sure it hasn't risen above 120. If it has, let it cool a bit until it's in that 110-120 range again.Step 4: Add the Yogurt
Take 2 cups of your milk, and add it to your bowl of yogurt. Stir together, and then pour mixture into crockpot. Stir to spread the cultures. Replace lid on crockpot, and wrap with bath towels. Allow to incubate for 10-12 hours. During this time, that healthy, live bacteria from the yogurt you added is turning the rest of your milk into yogurt. You don't need to check on it. Removing the towels will also remove heat, and you want to keep the milk warm so those cultures can spread and do their thing.Step 5: Wow, I made Yogurt!

Step 6: Pour Yogurt into your Strainer

This is where you'll thank me for using a crockpot liner! Line your strainer with your towel, and set it in the sink. Gently lift the bag out of your crockpot, and hold it over the strainer. Cut a hole in your bag with kitchen sheers, and the yogurt will pour into the strainer, virtually mess free. You wont even have to wash your crockpot, which is awesome, because I hate washing my crockpot.

Step 7: Straining
 |
| The towel, before I added the yogurt |

I gather the ends of my towel, and make a sort of yogurt "pouch". I twist them at the top, and try to squeeze out some of the whey. 

Then I fasten off the ends with a rubber band, place my "pouch" back in the strainer, put the strainer over a big bowl, and place the whole thing in the fridge. I like my yogurt very thick, because adding toppings thins it out again just a bit. I let it strain for up to 6 hours. You wont hurt it letting it sit longer than that, so feel free to leave it while you're at work, out doing errands, etc. If you are at home though, I would recommend periodically emptying the bowl of the collected whey.
 |
| whey that has collected in my bowl during straining |
Step 8: Pat Yourself on the Back, and add tasty toppings!
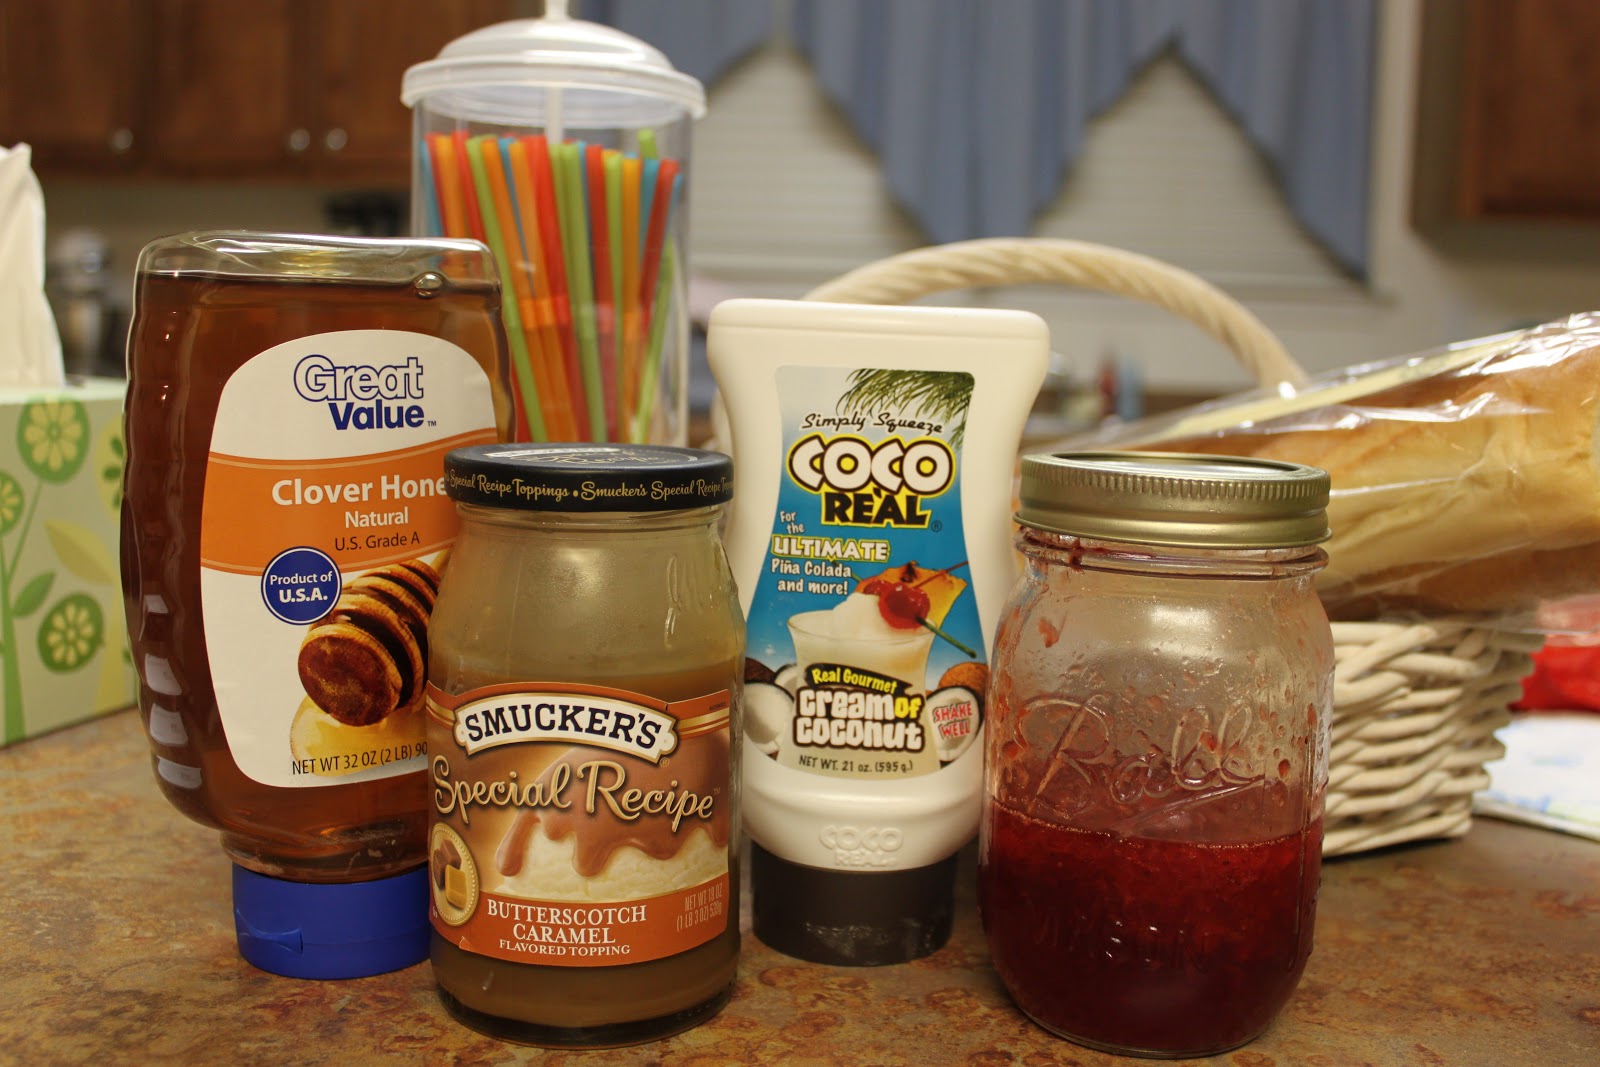
Once your yogurt has reached a thick consistency you're happy with, you're done! Just scrape it into a bowl or jar. My yogurt tends to be thick enough, that most of it just rolls right out of the towel and into my bowl. I scrape off the little bit that is left behind with a spatula, and then toss my towel into the washing machine. The yogurt should be good for 7-10 days in your refrigerator. Some recommend stirring it a bit to make it smooth. I've never felt like it needed that, but go for it if you want to. As for flavorings, you're limited only by your imagination. We like honey, strawberry syrup, caramel, and cream of coconut. My husband has requested a little homemade granola with his when he comes home and gives my new concoction a try!
For your next batch, if you remember to save 6 oz, then you do not need to keep buying regular yogurt from the store. You can continue to use 6 oz from each previous batch for the new one. I would recommend saving this separately from the start, because too often all the yogurt disappears before I remember to set some aside!
 |
| Anny and Merrylee enjoying my latest batch, with cream of coconut! |


Please let me know if you have any frustrations or questions. It's been a learning process for me, and it's possible I might be able to help you figure out what didn't work if you're having trouble. Good luck! If you try it and it works well, please leave a comment and tell me about it!


MOST impressive, Lizzy. Doubt I will try it, but I can admire yours.
ReplyDeleteWhat a great recipe! I love baking, jam thrills me, and I've recently begun making cheese - both hard and soft - and it is indeed arduous. My recipe books for cheese have yogurt recipes, but this one seems more approachable, so I may try it this weekend. Yogurt is one of the few dairy products I can eat that doesn't affect my tummy (the active cultures are why), but as you say, it is spendy.
ReplyDeleteA thought on heating your milk: have you tried a hot water bath in your sink? It is often the preferred method in cheese making as it will heat to the preferred temp fairly quickly (maybe not 17 minutes!) without scorching. Also, you can buy diffusers for your stove burners that go between your pot and burner to give you better control of the heat, often for under $20.
Thanks for sharing - Nerdy Mommies Rule!
Brenna Campbell (your sister Katie's former music teacher)
Thanks for doing the research and doing this a way you know it works. I'm a friend of Katie's and she said it worked for her! I love making my own stuff from scratch so I'm excited for when I actually try it. I pinned it on Pinterest though so I have your instructions for when I need them!
ReplyDeleteI tried it, and it totally worked! It took me a lot longer to get the milk to 180 degrees in the microwave, but maybe I just have a really low-powered one. And my linen cloth was too small to twist up into a rubberband at first. I juts let some of the whey strain out over an hour or two in the fridge then closed up the cloth. It was so runny at first I was afraid I'd let the cultures die or something, but after letting it strain for hours and kind of just forgetting about it, I opened the cloth and lo and behold, thick, creamy, amazing YOGURT!!! I just stood there staring at it in awe thinking, "Yeah, I made that. I'm kind of a big deal." Thanks for putting all the work into creating a good recipe, Lizzy. I can't believe I did it on the first try!
ReplyDeleteThanks Brenna for those heating ideas!! I'll have to look for those stove diffusers. I like the microwave method, but I don't have a big enough bowl that is microwave safe, so I have to do it in two batches. If you prefer regular yogurt to Greek, you can just skip the straining part, although if you do show some intolerance to dairy, straining the whey might make it even more gentle on your stomach. My little boy has a lactose allergy, (neither an all dairy allergy, nor an intolerance, just an allergy to lactose, it's weird) but he too does fine with yogurt and cheese.
ReplyDeleteGood luck Rachel! Once you try it once, I think you'll be surprised how easy it was, and you'll be hooked!
ReplyDeleteWooohoo, Go Katie!!! For some reason I got your comment late, although it looks like yours came first. Yeah, weird. Anyway, I'm so glad you tried it!! I'm doing a nerdy but awesome victory dance for you right now!!!
ReplyDeleteWHAT!? Seriously can't believe you did that... I do make bread, rolls, cakes, etc from scratch, but still feeling like this baby is out of my league! BUT you may have convinced me to try it :)
ReplyDeleteTry it, Becca, try it! It's fun and easy, pretty much a prep-and-forget about it recipe.
ReplyDelete